|
Axialflow
Honda S2000 Short Shifter DIY
Parts
Included:
• Short shift lever with bushings
• Retaining collar
• 5mm allen screws (3) |
Tools
Needed:
• Flat blade screwdriver
• 10mm socket with extension
• 5mm allen wrench (or socket) |
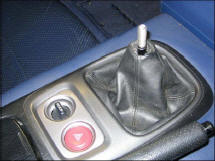
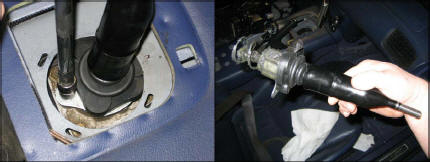
1.) Start by
removing the center console. In order to remove the center
console, you must first remove the shift knob.
2.) Gently pry the
center console assembly off from the transmission tunnel. It’s
held in place by a few plastic tabs and you shouldn’t have a
problem prying it loose.
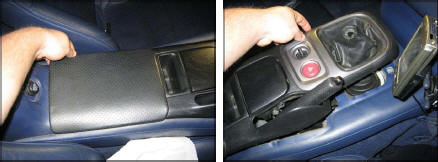
3.) Disconnect the
two wiring plugs from the underside of the console and remove
the center console from the car.
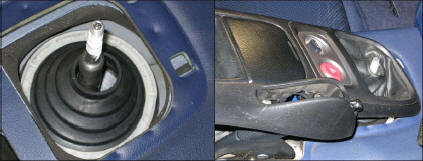
4.) Remove the
grey foam from the transmission tunnel, and remove the rubber
shifter boot. Use a screwdriver at the corners of the tunnel
opening to release the 4 clips on the underside of the white
plastic ring.
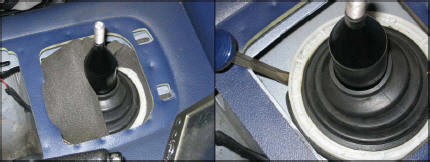
5.) Pull the
rubber cover up and twist it around to expose the (3) 10mm bolts
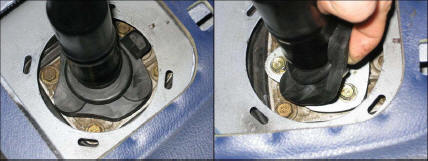
6.) Remove the
10mm bolts on the retaining collar
7.) Pull the
shifter assembly up and out of the transmission.
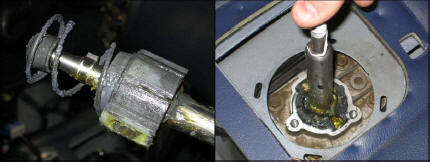
8.) Pull the
spring off the end of the stock shifter and install it onto the
short shifter.
9.) Make sure the
new shifter has plenty of grease, and then drop it into the
shifter housing. Notice
that it can only go in one way.
10.) Place the
retaining collar over the shifter and line up the bolt holes.
Notice the orientation of the indentation on the inner surface
of the collar points toward 6th gear.
11.) Install the 3
10mm Allen bolts and torque to 7.2lb/ft

12.) Reinstall the
rubber shifter boot and the grey insulating foam.
13.) Reinstall the
plugs for the hazard and roof switches, and then reinstall the
center console.
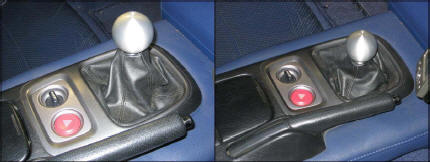
14.) Reinstall
your shift knob, and enjoy your short shifter!!!
BEFORE and AFTER:
Special thanks to
http://www.ricks2k.com/ for visual DIY instructions.
|